路由拦截(路由守卫)
与Vue相似,React也提供一个检验路由跳转的方法(路由守卫),让路由以条件的形式跳转,一般在项目中用于校验登陆状态,实现页面的跳转(例如登陆后才能查看个人信息等…)
与Vue不同,Vue中的路由拦截(路由守卫)有着一台非常严格的执行模式,但是在React中不一样, 在React中使用路由拦截是非常灵活的,我们只需在原Route基础上,将component属性改为render属性,并以回调函数的方式渲染及可,渲染的组件以函数返回值(return)的形式渲染出来
{}
<Route path="/home" component={Home}/>
{}
<Route path="/home" render={()=>isLogin()?<Home/>:<Login/>}/>
|
在使用路由守卫的过程中,一般组件间的嵌套都是高阶组件来实现的,就是我们在父组件中实现子组件的页面跳转,下面使用代码来实现一个小demo
案例展示:
这个案例有三个层级关系(爷爷组件 -> 父亲组件 -> 儿子组件),这里仅展示父亲组件和儿子组件,父亲组件为home组件, 在home组件中,点击对应的按钮可以跳转到对应的儿子组件中,但是需要浏览器本地有token字段,没有token字段统一跳转到login页面(儿子组件之一)
父亲组件(home)
import React from 'react'
import{HashRouter as Router,Route,Redirect,Switch,useHistory} from 'react-router-dom'
import About from './about.js'
import Info from './info.js'
import NotFound from './404.js'
import Login from './login.js'
const isLogin = ()=>{
return localStorage.getItem("token")
}
export default function Home(props) {
const history = useHistory()
const goRoute = (route)=>{
console.log('父组件提供过来的router方法,用于路由跳转',props);
history.push(route)
}
return (
<div>
首页
{/* 编程式路由跳转 */}
<ul>
<li>
<button onClick={()=>goRoute(`/home/info`)}>info(编程式)</button>
</li>
<li>
<button onClick={()=>goRoute(`/home/about`)}>about(编程式)</button>
</li>
</ul>
{/* 在子组件下设置二级路由调用 */}
<div style={{width:'200px',height:'600px',backgroundColor:'skyblue'}}>
<Router>
{/* 使用Switch来解决每次页面刷新,重定向功能执行的bug(模糊匹配) */}
<Switch>
{/* -------------------- 路由守卫设置 ------------------------------ */}
{/* 多级路由 设置动态路由(携带参数) 路由守卫(判断当前是否登录) */}
<Route path="/home/about" render={()=>{
return isLogin()?<About/>:<Redirect to='/home/login'/>
}}/>
{/* 多级路由 设置动态路由(携带参数) 路由守卫(判断当前是否登录) */}
<Route path="/home/info" render={()=>isLogin()?<Info/>:<Redirect to='/home/login'/>}/>
{/* 路由拦截转回登陆页面 */}
<Route path="/home/login" component={Login}/>
{/* ----------------------------------------------------------------- */}
{/* 路由的重定向(使用exact实现精确匹配),一进入home页面默认跳转到info页面 */}
<Redirect from="/home/" to="/home/info" exact/>
{/* 匹配不到的页面则展示404 */}
<Route component={NotFound}/>
</Switch>
</Router>
</div>
</div>
)
}
|
import React, { Component } from 'react'

export default class login extends Component {
  render() {
    return (
      <div>
        <h1>登陆页面</h1>
        <button onClick={()=>{
            // 点击后设置本地token
            localStorage.setItem("token","123")
            console.log('token设置成功!正在跳转到info页面');
            //通过父子关系获取到父组件传过来的路由跳转方法
            this.props.history.push('/home/info')
        }}>点击登录</button>
      </div>
    )
  }
}
|
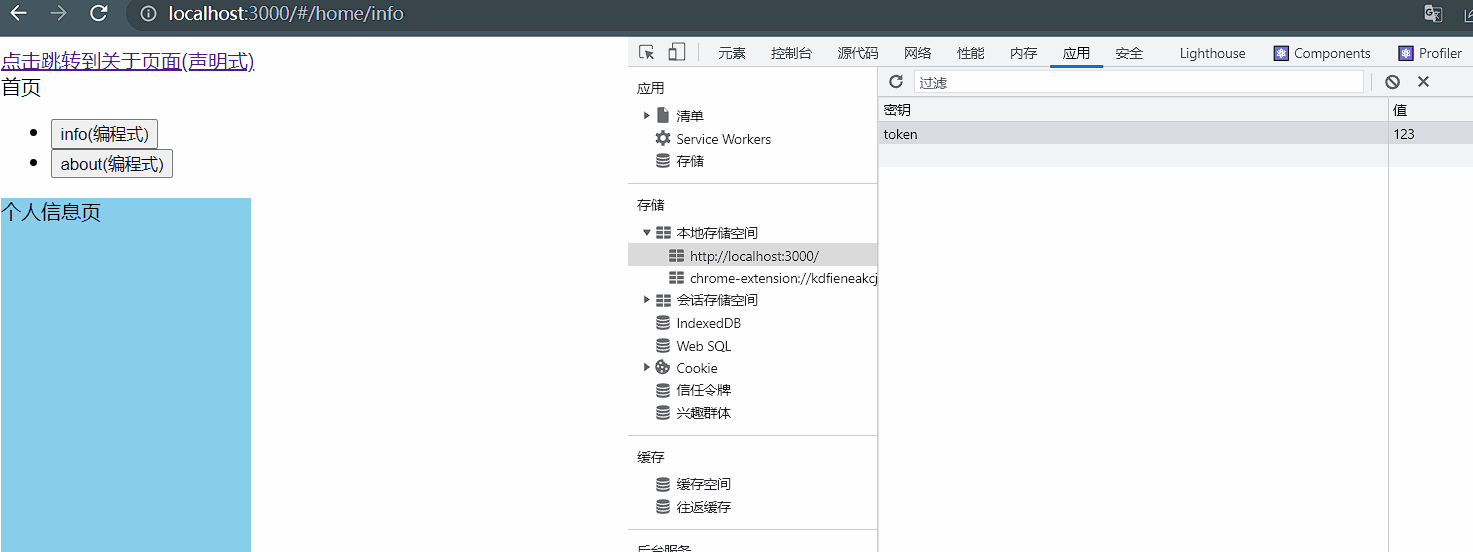
结果展示:
路由模式
- 我们一直在使用的路由方式是
BrowserRouter,也就是浏览器的路由方式,其实React还有几种路由方式:
1、BrowserRouter:
	浏览器的路由方式,无#路径,也就是在开发中最常使用的路由方式(向后端发请求)

2、HashRouter:
	在路径前加入#号成为一个哈希值,Hash模式的好处是,再也不会因为我们刷新而找不到我们的对应路径(不会向后端发送请求)

3、MemoryRouter:
	不存储history,所有路由过程保存在内存里,不能进行前进后退,因为地址栏没有发生任何变化

4、NativeRouter:
	经常配合ReactNative使用,多用于移动端

5、StaticRouter:
	设置静态路由,需要和后台服务器配合设置,比如设置服务端渲染时使用
|
withRouter
- 在学习
withRouter之前,我们先来了解一下在<Router/>中使用component属性和render属性来渲染组件的区别, 在component中,子组件是通过class类创建在父组件内部的,也就是说: 使用component属性指向的路由组件可以很轻松的通过props接收到父组件传给你的路由调用方法(如history等…..),但是使用render不一样,要想在使用render方法来渲染的子组件中使用history等方法则需要我们手动的传参给子组件!
{}
<Route path="/home" render={(props)=><Home {...props}/>}/>
{}
<Route path="/home" component={Home}/>
|
如果不手动传入props形参的话,在子组件中使用props则会报错!

使用render渲染路由子组件报错问题的解决方法一般有两种:
{}
<Route path="/home" render={(props)=><Home {...props}/>}/>
{}
const history = useHistory()
history.push(route)
|
子组件的子组件一直往后面嵌套也是如此(通过父传子的方式{...props}), 由此可见,这样的层级嵌套太深且一旦元祖级组件(第一级的父组件)的props或者其中一个层级的组件的props传参出现问题,那么往后的每一级props都会出现问题,由此衍生出另一种解决方法:那就是将自己包装成元祖级组件(withRouter)
官方文档
我们可以认为withRouter是一个干爹组件,它可以让我们不需要受控于父组件传递props而直接获取props; 它的作用是可以加工一般组件,让一般组件具备路由组件所特有的API(history,match,location等…)
withRouter是高阶组件的一种(高阶组件就是将旧的,能力不强的组件重新包裹封装成一个新的,强力的组件)
使用方法:
- 引入
import {withRouter} from 'react-router-dom'
|
- 使用
withRouter包裹目标组件实现加工
const Home = withRouter(Home)
export default withRouter(Home)
|
代码展示:
import React from 'react'
import{HashRouter as Router,Route,Redirect,Switch,withRouter} from 'react-router-dom'
import About from './about.js'
import Info from './info.js'
import NotFound from './404.js'
import Login from './login.js'
const isLogin = ()=>{
return localStorage.getItem("token")
}
function Home(props) {
const goRoute = (route)=>{
console.log('使用withRouter获取的props:',props);
props.history.push(route)
}
return (
<div>
首页
{/* 编程式路由跳转 */}
<ul>
<li>
<button onClick={()=>goRoute(`/home/info`)}>info(编程式)</button>
</li>
<li>
<button onClick={()=>goRoute(`/home/about`)}>about(编程式)</button>
</li>
</ul>
{/* 在子组件下设置二级路由调用 */}
<div style={{width:'200px',height:'600px',backgroundColor:'skyblue'}}>
<Router>
{/* 使用Switch来解决每次页面刷新,重定向功能执行的bug(模糊匹配) */}
<Switch>
{/* -------------------- 路由守卫设置 ------------------------------ */}
{/* 多级路由 设置动态路由(携带参数) 路由守卫(判断当前是否登录) */}
<Route path="/home/about" render={()=>{
return isLogin()?<About/>:<Redirect to='/home/login'/>
}}/>
{/* 多级路由 设置动态路由(携带参数) 路由守卫(判断当前是否登录) */}
<Route path="/home/info" render={()=>isLogin()?<Info/>:<Redirect to='/home/login'/>}/>
{/* 路由拦截转回登陆页面 */}
<Route path="/home/login" component={Login}/>
{/* ----------------------------------------------------------------- */}
{/* 路由的重定向(使用exact实现精确匹配),一进入home页面默认跳转到info页面 */}
<Redirect from="/home/" to="/home/info" exact/>
{/* 匹配不到的页面则展示404 */}
<Route component={NotFound}/>
</Switch>
</Router>
</div>
</div>
)
}
export default withRouter(Home)
|
结果展示: